The store will not work correctly when cookies are disabled.
We collect user information to provide a better user experience and protect the security of our website. By continuing to use our website, you acknowledge the use of cookies.
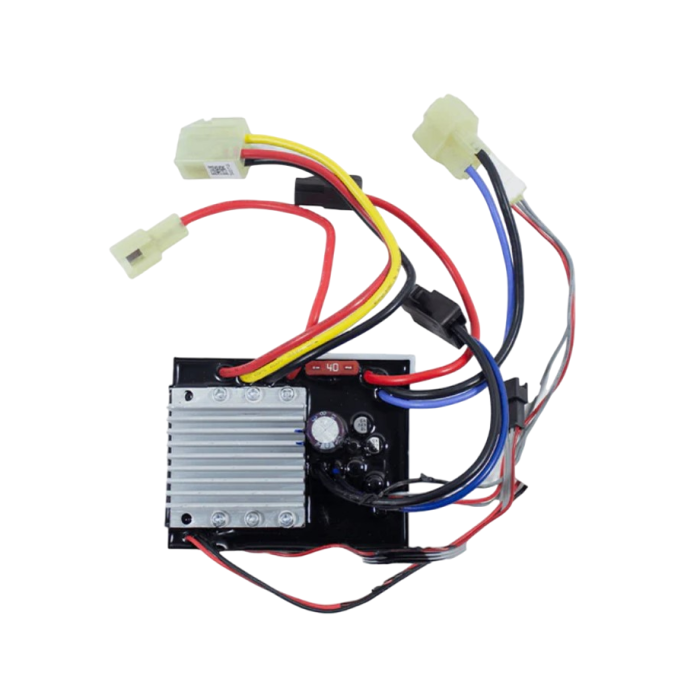
The Greenworks R0201187-00 Power Control Board is an essential part used to control and manage electrical power. It plays the role of distribution where the voltage and current are regulated to ensure that they are at their better and not destructive. This board receives inputs from the controls, for instance, the speed control and then converts these inputs into accurate power output to the motor. These include the provision of an optimum and steady power supply, increased duration of use by the parts, and protection from overloading. It has accurate power control that enhances the durability of the tools and also improves their performance.
What maintenance is required for the Greenworks R0201187-00 Power Control Board?
Regularly inspect the power control board for loose connections, burnt components, or corrosion. Keep the board free of dust, moisture, and debris to prevent short circuits. Ensure proper mounting and secure wiring. Replace the board immediately if signs of damage or malfunction appear to maintain safe and reliable operation.
What are common issues with the Greenworks R0201187-00 Power Control Board?
We strive to provide our customers with a hassle-free and efficient shopping experience. Our shipping policy ensures the timely delivery of your orders and complete customer satisfaction. View More
We are committed to ensuring your complete satisfaction with every purchase. We understand that circumstances may arise where you must return a product or request a refund. If for any reason you are not satisfied, you may return the item(s) according to the terms outlined below. View More
This Payment Policy outlines the terms and conditions governing all payments made for products purchased through our website. By making a purchase, you agree to be bound by this Payment Policy. View More
Installation Steps
Step1: Turn off the equipment and remove the battery before servicing.
Step2: Remove the housing cover to access the control board.
Step3: Disconnect all wire connectors from the old board carefully.
Step4: Unscrew and remove the defective board from its mount.
Step5: Install the new board and secure it firmly.
Step6: Reconnect wiring, reassemble the cover, and test operation safely.

Validate your login