DIY Lawn Mower Bag Replacement: A Professional Maintenance Guide
Replacing a lawn mower bag is a routine maintenance task that directly affects cutting efficiency, debris collection, and overall machine performance. Using an incorrect or poorly fitted bag can restrict airflow, reduce collection capacity, and place unnecessary stress on the mower’s components. Understanding bag types, compatibility requirements, and safety considerations ensures the replacement process is both effective and risk-free.
This article provides a clear, step-by-step DIY approach to lawn mower bag replacement. It covers the tools required, proper installation techniques, and common mistakes to avoid during the process. By following these practical guidelines, users can improve mowing consistency, extend equipment lifespan, and maintain optimal lawn care results throughout the mowing season.
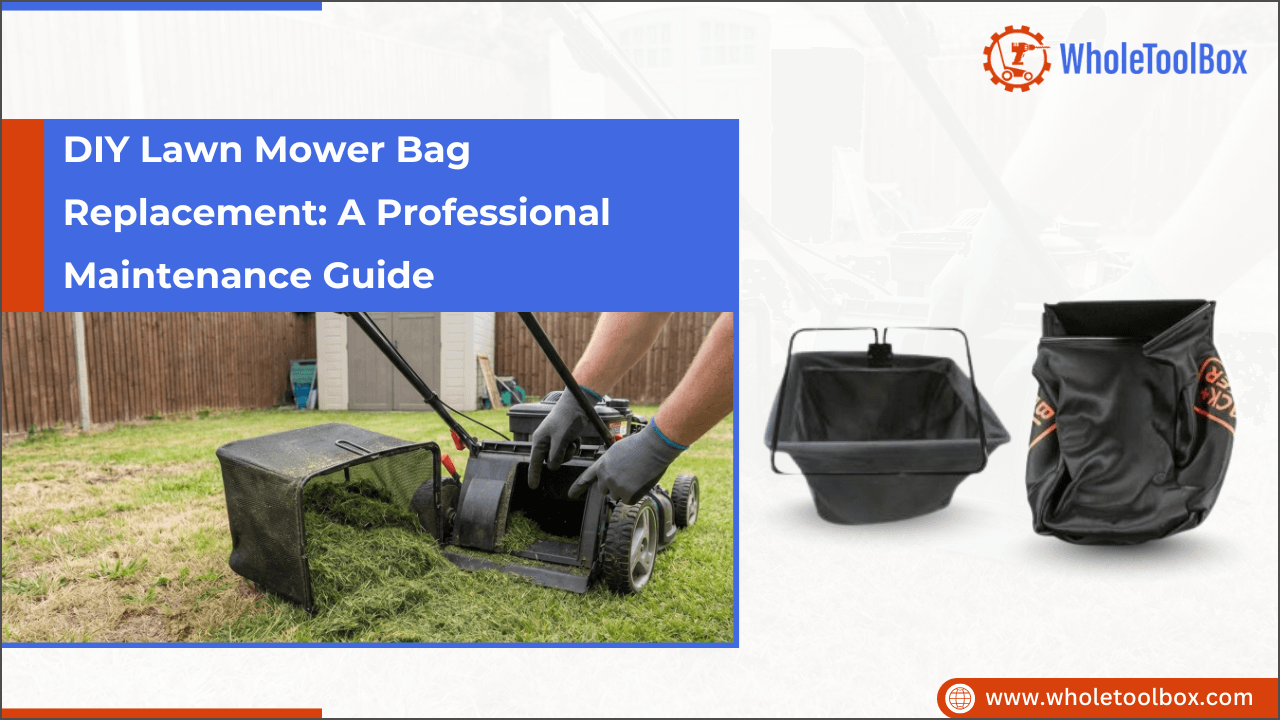
Understanding Lawn Mower Bag Types and Compatibility
Choosing the right lawn mower bag ensures efficient grass collection and prevents clogging. Refer to the table below to match bag types with your mower for optimal performance.
|
Lawn Mower Bag Type |
Material |
Compatible Mower Type |
|
Soft Fabric / Mesh |
Breathable fabric or mesh |
Push & Self-Propelled Mowers |
|
Hard Plastic |
Rigid plastic shell |
Walk-Behind Mowers |
|
Hybrid (Plastic + Fabric) |
Plastic top with fabric sides |
Residential & Light Commercial Mowers |
|
Riding Mower Bagger |
Hard plastic bins |
Lawn Tractors & Riding Mowers |
|
Zero-Turn Bagger |
Hard plastic or hybrid bins |
Zero-Turn Mowers |
WholeToolBox provides high-quality lawn mower parts, including flywheels, crankshafts, and carburetors to fit trusted brands such as Honda, Kohler, and Briggs & Stratton.
Tools and Safety Precautions Before Replacing the Mower Bag
Replacing a lawn mower bag is a relatively simple task, but having the correct tools and following proper safety procedures is essential to prevent injury and ensure correct installation.
Tools Required
-
Work Gloves
-
Stiff Brush or Plastic Scraper
-
Clean Cloth or Rag
-
Mild Detergent (Optional)
-
Basic Hand Tools (Screwdriver, Wrench)
Safety Precautions
Following proper safety precautions is critical before performing any lawn mower maintenance, including bag replacement:
-
Disconnect Power Completely: Turn off the mower and remove the spark plug wire on gas models, or unplug/remove the battery on electric mowers. This prevents accidental startup.
-
Allow Components to Cool: If the mower has been in use, wait until the engine, muffler, and surrounding components have cooled. Hot surfaces can cause burns during handling.
-
Stabilize the Mower: Positioning the mower on flat ground prevents tipping or rolling while removing or installing the lawn mower bag.
-
Avoid Blade Contact: Never insert hands or tools into the discharge chute beyond what is necessary for cleaning. Blades can remain sharp and dangerous even when the mower is powered off.
-
Maintain Proper Body Position: Maintain a stable stance when lifting or attaching the bag to avoid strain or loss of balance.
-
Clear Debris: Inspect the discharge chute and mounting area for grass, dirt, or debris to ensure proper bag fit and maintain airflow for optimal mowing performance.
Adhering to these safety precautions minimizes risk, protects equipment components, and ensures the lawn mower bag replacement process is completed safely and correctly.
Step-by-Step DIY Lawn Mower Bag Replacement Process
Follow these steps to ensure proper installation, maintain airflow, and prevent damage to your lawn mower bags.
Step 1: Remove the Existing Lawn Mower Bag: Lift the rear or side discharge cover and detach the old bag from its hooks or brackets. If it has a support frame, remove it as one piece. Check the frame for bends, cracks, or corrosion that could affect the new bag fit.
Step 2: Inspect the Discharge Chute and Hardware: Examine the discharge chute for grass buildup, hardened debris, or damage. Clean thoroughly and check hooks, springs, and hinges. Tighten or replace any worn or loose components.
Step 3: Assemble the Replacement Bag: Insert the rigid frame into the bag’s fabric or mesh body following the manufacturer's instructions. Ensure the frame is fully seated so the bag retains its proper shape.
Step 4: Install the New Lawn Mower Bag: Align the bag with the discharge chute and attach it to the mounting points. Ensure it hangs evenly and the lawn mower bag attachment is securely fastened to prevent misalignment or detachment.
Step 5: Check Fit and Stability: Gently shake the bag to confirm it is secure. Verify it does not interfere with wheels, levers, or cables. Only reconnect the spark plug or battery after confirming proper installation.
Check out lawn mower clutch replacement: DIY vs. professional cost breakdown to compare costs and choose the best repair option.
Common Lawn Mower Bag Replacement Mistakes and How to Avoid Them
Replacing a lawn mower bag is simple, but mistakes can reduce performance or cause damage. Here are the most common errors and tips to avoid them.
Mistake 1: Using an Incorrect Bag: Using a bag that doesn’t match your mower model can block airflow, reduce grass collection, and cause clippings to escape. It may also strain or damage the mounting points over time.
How to Avoid It: Always verify your mower’s model and check the manufacturer’s specifications before purchasing a replacement lawn mower bag. Using the wrong bag can reduce airflow, cause clippings to escape, and damage mounting points.
Mistake 2: Ignoring Frame Condition: A bent, cracked, or rusty frame can prevent the new bag from fitting properly, causing sagging or detachment during mowing. Even if the fabric is fine, a damaged frame compromises the bag's stability.
How to Avoid It: Inspect the old bag’s frame for bends, cracks, or rust before installation. A damaged frame can prevent the new bag from fitting correctly, even if the fabric is in good condition.
Mistake 3: Failing to Clean the Discharge Chute: Grass buildup or debris in the chute restricts airflow, reduces collection efficiency, and can cause the mower to strain. This may lead to uneven cuts or even engine damage over time.
How to Avoid It: Remove built-up grass, dirt, and debris from the chute and mounting area. A clogged chute can block airflow, reduce collection efficiency, and strain the mower.
Mistake 4: Improper Bag Alignment: If the bag isn’t aligned with the discharge chute, clippings can escape onto the lawn, reducing the efficiency of collection. Misalignment can also stress hooks and mounting points.
How to Avoid It: Ensure the bag opening aligns correctly with the discharge chute and mounting points. Misalignment leads to clippings escaping and uneven collection.
Mistake 5: Skipping the Stability Check: A loosely mounted bag can interfere with mower components or fall off during operation, resulting in uneven collection, potential damage, or safety hazards.
How to Avoid It: Always shake the bag gently after installation to confirm it is securely mounted. Make sure it does not interfere with wheels, levers, or cables before reconnecting the spark plug or battery.
Check out the DIY guide: how to clean your lawn mower grass bag like a pro
for better airflow, improved collection efficiency, and longer bag life
Conclusion: Keep Your Lawn Mower Performing at Its Best
Replacing a lawn mower bag is a simple yet essential maintenance task that directly impacts cutting efficiency, debris collection, and overall mower performance. By understanding bag types, ensuring compatibility, and following proper installation steps, you can maintain optimal airflow, reduce clipping escape, and prevent unnecessary wear on mower components. Proper care and timely replacement also extend the lifespan of both the bag and the mower, ensuring consistent lawn care results throughout the season.
Key Takeaways
-
Always select the correct lawn mower bag compatible with your mower model.
-
Inspect and clean the discharge chute before installing a new bag.
-
Use proper tools such as gloves, brushes, and basic hand tools for safe handling.
-
Follow safety precautions: disconnect power, let components cool, and stabilize the mower.
-
Ensure proper bag assembly, alignment, and secure mounting before use.
-
Avoid common mistakes like ignoring frame condition or skipping stability checks to maintain performance.
Adhering to safety precautions, using the correct tools, and avoiding common replacement mistakes further ensures a smooth, risk-free DIY process. Whether you are a homeowner performing routine maintenance or a professional maintaining multiple units, following a systematic approach to lawn mower bag replacement keeps your equipment functioning efficiently and safely.
FAQs
How often should I empty my lawn mower bag?
Empty the lawn mower bag when it reaches about two-thirds full. Overfilling restricts airflow, reduces collection efficiency, and can cause clumping or uneven cuts.
Will WD-40 keep grass from sticking to a mower deck?
WD-40 can temporarily reduce grass buildup, but it is not recommended for regular use. A silicone-based or mower-specific deck spray is a better long-term solution for preventing grass from sticking.
Why is my lawnmower’s grass not going into the catcher?
Common causes include a clogged discharge chute, a full or damaged bag, low blade lift, or mowing wet grass. Cleaning the chute and ensuring the bag and blade are in good condition usually resolves the issue.
How do you attach a grass bag to a Toro lawn mower?
Lift the rear discharge door, align the bag frame with the mounting hooks, and lower the door so it rests securely on the bag. Ensure the bag is firmly seated before operating the mower.


