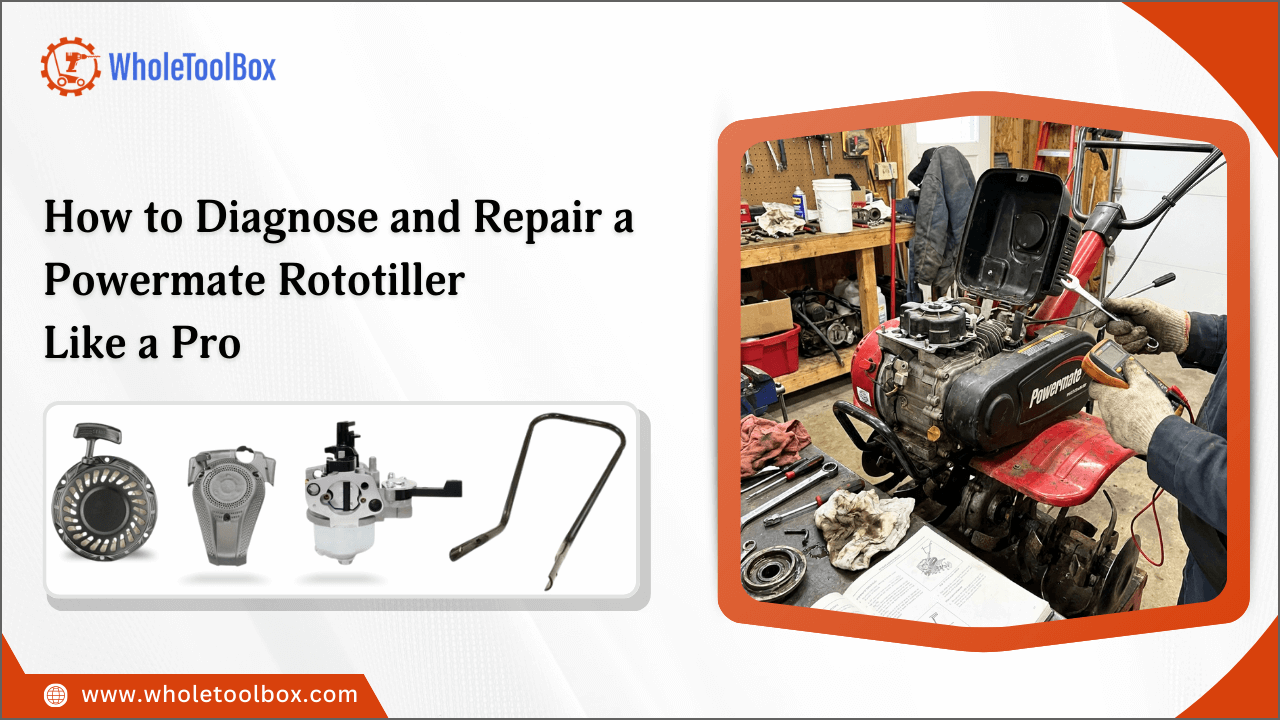
How to Diagnose and Repair a Powermate Rototiller Like a Pro
Struggling with a Powermate rototiller that won’t start or won’t dig as it used to? Many users face the same challenges. These powerful machines can develop issues over time, from worn blades to engine troubles. Understanding how to troubleshoot and repair your tiller can save time, money, and frustration.
This blog covers essential Powermate rototiller parts, engine troubleshooting, starting issues, and transmission or tine problems. Whether facing engine failures, stubborn starts, or dull blades, these tips will help you maintain and repair your tiller like a pro.
Understanding How a Powermate Rototiller Works and Its Key Components
A Powermate rototiller relies on a combination of engine power, transmission, and blade mechanisms to cultivate soil efficiently. Knowing how each part functions helps in diagnosing issues and performing timely maintenance. Below are the key components of a Powermate rototiller and their roles:
-
Engine System: The Powermate rototiller engine is the core of the machine. It powers the tines and drive mechanism through a series of internal combustion cycles. If the engine fails to start or runs inconsistently, the entire tilling process is affected. Common issues include clogged carburetors, dirty spark plugs, or restricted airflow due to a clogged Powermate rototiller air filter.
-
Transmission and Drive System: The transmission transfers power from the engine to the tines and wheels. Worn belts, damaged gears, or loose drive cables can reduce torque and cause poor soil penetration.
-
Tines and Blade Assembly: Powermate rototiller blades are responsible for cutting and turning the soil. Over time, they can become dull, bent, or broken, leading to inefficient tilling and increased engine strain.
-
Air Filter and Fuel Components: The air filter ensures clean airflow into the engine, while the carburetor regulates the fuel-air mixture. A dirty Powermate rototiller air filter can lead to rough running, power loss, or engine stalling.
-
Operator Controls and Safety Mechanisms: Throttle controls, safety levers, and choke systems are essential for proper operation. Malfunctioning controls can create the illusion of engine failure even when the internal components are functional.
Note: Referring to the Powermate rototiller manual is highly recommended for accurate part identification and maintenance intervals.
Looking for reliable parts to keep your Powermate rototiller performing at its best? Shop high-quality lawn equipment parts at WholeToolBox at competitive prices, where we offer durable parts such as pump assemblies, dual circuit breakers, piston & cylinder assemblies designed for optimal performance and long-lasting reliability.
How to Diagnose Common Powermate Rototiller Engine and Starting Problems
Engine-related issues are among the most common problems with Powermate rototillers. If your Powermate tiller won’t start or struggles to stay running, a structured diagnostic approach will help identify and resolve the problem efficiently. Below are the key steps to diagnose engine and starting issues:
-
Check the Fuel System First: Old or contaminated fuel is a leading cause of engine failure. If the tiller has been stored for an extended period, the fuel may have degraded and caused carburetor blockages. Drain the tank, refill with fresh gasoline, and inspect the fuel lines for cracks or clogs.
-
Inspect the Spark Plug: A fouled or worn spark plug can prevent ignition. Remove the spark plug and check for carbon buildup, oil deposits, or corrosion. Cleaning or replacing the spark plug often resolves Powermate rototiller engine problems quickly.
-
Examine the Air Filter: A dirty Powermate rototiller air filter restricts airflow and disrupts combustion. Remove the filter and clean it with compressed air or replace it if excessively clogged. This simple step can significantly improve starting performance.
-
Evaluate the Carburetor: If the engine cranks but does not start, the carburetor may be clogged. Cleaning the carburetor jets and bowl can restore proper fuel delivery. Persistent starting issues often indicate the need for a carburetor rebuild or Powermate rototiller replacement parts.
-
Test the Ignition Coil and Wiring: Damaged ignition components can cause intermittent starting failures or sudden shutdowns. Inspect all wiring connections and test the ignition coil using a multimeter for continuity.
-
Diagnose Choke and Throttle Settings: Incorrect choke positioning is a common reason a Powermate tiller won’t start. Ensure the choke is engaged during cold starts and gradually adjusted once the engine warms up.
How to Identify Transmission, Tine, and Drive System Issues in a Powermate Rototiller
If the engine runs but the tiller does not move or turn properly, the issue likely lies within the drive or tine system. Below are the common issues to check,
-
Transmission Failure: A slipping transmission often produces unusual noises or reduced tine rotation. Inspect the drive belt for wear, cracks, or looseness. Replacing worn belts is a key part of effective Powermate rototiller repair.
-
Worn or Damaged Tines: Powermate rototiller blades gradually dull after repeated use in hard soil. Signs of blade wear include poor soil penetration, uneven tilling depth, and increased vibration. Sharpening or replacing the blades restores optimal tilling efficiency.
-
Drive Cable and Engagement Problems: If the tines do not engage when the control lever is pressed, the drive cable may be stretched or disconnected. Adjusting or replacing the cable ensures proper power transfer.
-
Gearbox and Lubrication Issues: Low or contaminated gearbox oil can cause grinding noises and mechanical resistance. Regular lubrication prevents internal wear and extends the lifespan of Powermate rototiller parts.
-
Wheel and Axle Inspection: Difficulty in maneuvering the tiller can indicate axle or wheel assembly problems. Check for debris buildup, bent axles, or worn bearings that could affect mobility.
How to Repair Frequent Powermate Rototiller Failures Step by Step
Proper repair procedures require a structured approach and the right replacement components. Below is a professional step-by-step repair framework for common issues.
Step 1: Perform a Full Visual Inspection
Start by checking for loose bolts, cracked housings, worn belts, and damaged fuel lines. Identifying visible defects can save significant troubleshooting time.
Step 2: Clean and Service the Air Intake System
Remove the air filter housing and inspect the Powermate rototiller air filter. Clean or replace it to restore proper airflow and combustion efficiency.
Step 3: Replace Worn Spark Plug and Fuel Lines
Install a new spark plug if ignition is weak. Inspect fuel lines for leaks or blockages and replace them if necessary to ensure smooth fuel flow.
Step 4: Repair or Rebuild the Carburetor
Disassemble the carburetor and clean all jets and internal passages using carburetor cleaner. Reassemble carefully and adjust idle settings according to the Powermate rototiller manual.
Step 5: Adjust or Replace the Drive Belt
If the tines rotate inconsistently, remove the belt cover and inspect the drive belt. Replace worn belts with compatible Powermate rototiller replacement parts to restore torque and performance.
Step 6: Sharpen or Replace the Tiller Blades
Remove the blade assembly and sharpen the edges evenly using a grinder or file. If the blades are bent or excessively worn, install new Powermate rototiller blades for optimal soil penetration.
Step 7: Lubricate Moving Components
Apply appropriate lubrication to gears, cables, and rotating shafts to reduce friction and mechanical wear.
Step 8: Test the Engine and Load Performance
After completing repairs, start the tiller and test it under light soil conditions. Observe engine stability, tine rotation, and throttle response to confirm successful repair.
Check out the Powermate tiller troubleshooting guide: common issues and fixes for easy tips to keep your tiller running smoothly
Summary: Diagnosing and Repairing a Powermate Rototiller Like a Pro
A Powermate rototiller is a robust tool for soil cultivation, but it can face issues like engine failure, starting problems, or worn blades over time. Proper diagnosis of engine, transmission, and tine issues ensures reliable performance. Step-by-step repairs, including cleaning the air filter, replacing spark plugs, sharpening blades, and checking drive components, help restore efficiency.
Key Takeaways
-
Inspect the engine, fuel system, and spark plug to resolve starting issues.
-
Clean or replace the Powermate rototiller air filter regularly to maintain performance.
-
Check transmission, drive belts, and cables for proper power transfer.
-
Sharpen or replace dull or damaged tiller blades for efficient soil cultivation.
-
Lubricate moving parts and gearbox to prevent wear and mechanical resistance.
-
Refer to the Powermate rototiller manual for accurate maintenance and part replacement guidance.
FAQs
Why does my Powermate Rototiller keep shutting off?
Frequent shutdowns are usually caused by fuel, air, or ignition issues. Common reasons include a clogged carburetor, a dirty air filter, stale fuel, or a worn spark plug. Cleaning the carburetor, replacing the air filter, and using fresh fuel often resolve this problem.
Do tiller blades need to be sharpened?
Yes. Dull blades reduce soil penetration and make the engine work harder, leading to inefficient tilling and increased wear. Regularly sharpening or replacing blades ensures smoother operation and better performance.
Why won't my Powermate tiller engine stay running?
If the engine starts but dies quickly, it may be due to restricted airflow, fuel delivery problems, or carburetor issues. Check the air filter, fuel lines, and carburetor for blockages, and adjust the choke and throttle as needed to maintain consistent running.
| Disclaimer: This information is for general guidance on Powermate rototiller maintenance and repair. Always follow the manufacturer’s instructions and seek professional help for complex issues. |


