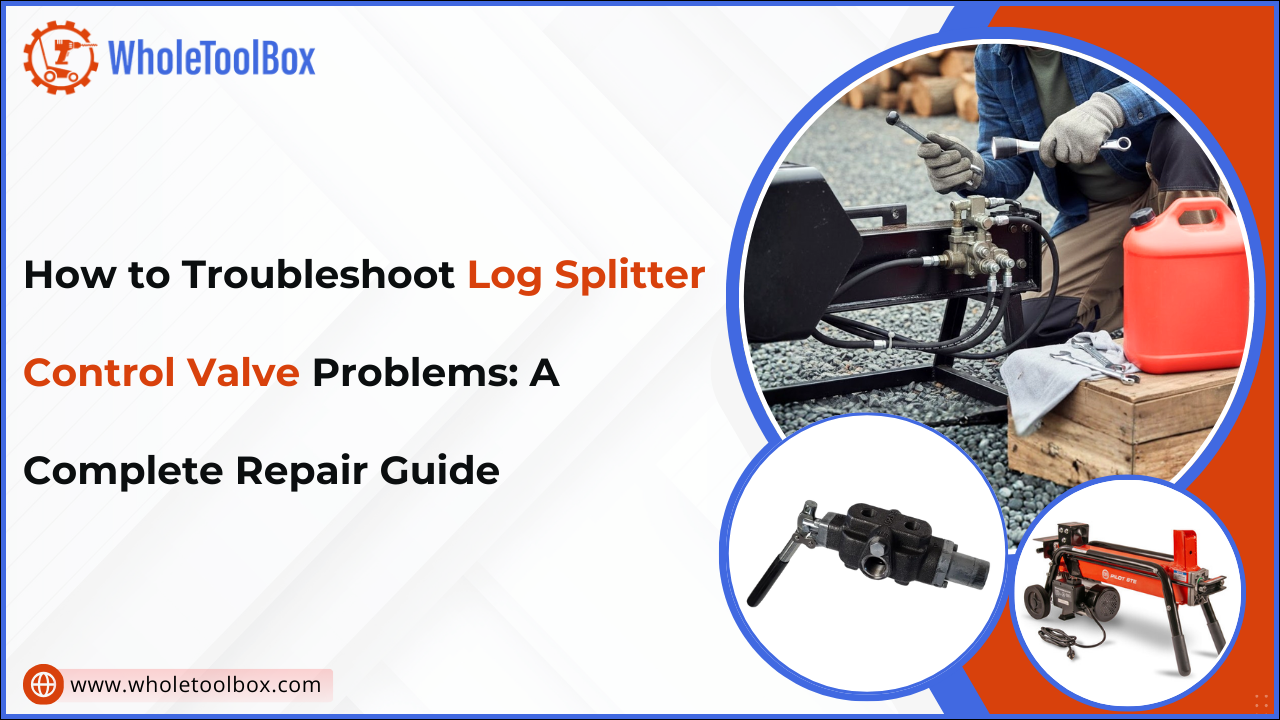
How to Troubleshoot Log Splitter Control Valve Problems: A Complete Repair Guide
A well-functioning log splitter control valve is essential for keeping a log splitter running smoothly. When this part begins to fail, you may notice slow splitting, weak pressure, leaks, or a valve that does not respond as it should. Understanding how the log splitter control valve works and knowing the right steps to diagnose issues can save you time, money, and unnecessary repairs.
This guide explains the common warning signs to watch for, the tools and safety gear you need, and the correct approach to inspecting each component. You will also learn simple repair methods and when a replacement is the best choice. By the end, you will be better prepared to keep your log splitter safe, reliable, and performing at its best.
Understanding How a Log Splitter Control Valve Works
The control valve is the heart of the hydraulic system in a log splitter. Its primary job is to regulate hydraulic fluid flow between the pump, cylinder, and reservoir, allowing the wedge to move forward and backward with controlled pressure. Understanding this basic function makes troubleshooting much more manageable.
Key Components of a Control Valve
A clear understanding of each component also helps when installing a log splitter control valve rebuild kit during maintenance or repair.
-
Spool: A sliding mechanism inside the valve body that directs fluid flow depending on its position.
-
Relief Valve: Protects the system from excessive pressure by redirecting fluid when limits are exceeded.
-
Detent Mechanism: Holds the valve in the return position until the cylinder completes its stroke.
-
Valve Body: The housing that contains the spool, seals, and internal hydraulic channels.
WholeToolBox offers high-quality turf rake and seeder parts, chipper shredder parts, log splitter gear pumps, control valves, and beam kits designed to fit trusted brands like MTD and Ariens Company.
Common Log Splitter Control Valve Problems You Should Look For
Identifying the symptoms of control valve failure helps you fix issues quickly and prevent damage to other hydraulic components. Below is a table of the most frequent problems log splitter owners encounter:
|
Problem |
Symptoms |
Possible Causes / Fixes |
|
Sticky or Unresponsive Valve Lever |
The lever is hard to move, ram jerks or hesitates |
Dirt, worn seals, or damaged spool; clean the valve, lubricate, and replace worn parts |
|
Poor Valve Adjustment |
Wedge stalls, ram doesn’t return fully, pressure feels weak |
Detent misalignment or shifted linkage; adjust the valve and check linkages |
|
Hydraulic Leak Around the Valve |
Oil around the valve area, pressure drops |
Loose fittings, cracked seals, or damaged internal parts; tighten fittings or replace seals |
|
Unusual Noises or Vibrations |
Grinding, whining, or vibration during operation |
Internal wear, fluid contamination, or failing relief valve; inspect valve, clean fluid, replace worn components |
|
Control Handle Feels Stiff or Loose |
The handle is too hard or too floppy to operate |
Worn linkage or internal valve parts; repair or replace worn components |
|
Hydraulic Fluid Spray on Ram Retraction |
Fluid sprays out when the ram returns |
Worn seals, cracked hoses, or internal leaks; replace seals or hoses, inspect valve |
|
Slow or Weak Splitting Force |
Ram moves slowly or struggles to split wood |
Blocked passages, internal wear, or faulty relief valve; clean passages, replace worn parts, adjust relief valve |
Regularly inspecting your control valve and addressing issues early can extend the life of your log splitter. Timely maintenance ensures smooth operation, safety, and consistent splitting performance.
Check out this ultimate checklist for spotting problems in commercial outdoor power equipment to ensure peak performance and extend the life of your machines.
Tools and Safety Gear Needed Before Starting Troubleshooting
Working on hydraulic systems requires careful preparation. Before inspecting or repairing a hydraulic control valve for log splitter, gather the right tools and safety equipment to prevent accidents.
Essential Tools
-
Wrench set
-
Screwdrivers
-
Hydraulic pressure gauge
-
Cleaning brushes & rags
-
Replacement O-rings & seals
-
Thread sealant/Teflon tape
-
Drain pan
Safety Gear
-
Safety gloves
-
Safety goggles
-
Steel-toe boots
-
Work apron
Safety Precautions Before Starting
-
Turn off the engine and disconnect the spark plug to prevent accidental startup.
-
Release hydraulic pressure before touching hoses or fittings.
-
Allow the equipment to cool to avoid burns from hot fluid.
-
Work on a clean, level surface to prevent slips or tipping.
-
Keep a fire extinguisher nearby in case hydraulic fluid ignites.
-
Follow manufacturer instructions for torque, adjustments, and procedures.
Step-by-Step Process for Diagnosing Control Valve Issues
Troubleshooting control valves in outdoor equipment parts requires a clear, methodical approach to fully understand where the fault lies. Follow the steps below for an effective diagnostic process.
Step 1: Check for External Leaks
Begin by visually inspecting all hoses, fittings, and seals connected to the valve. External leaks are common and often easy to fix. Look for:
-
Dripping hydraulic fluid from fittings or hose connections
-
Wet spots or stains around seals and valve surfaces
-
Cracks, bulges, or wear at hose ends
Even small leaks can reduce system pressure and affect splitting performance. Tightening fittings or replacing worn seals may immediately restore normal operation.
Step 2: Inspect the Control Handle Movement
Operate the handle through all positions, including forward, neutral, and reverse. Smooth, precise movement indicates a healthy valve. Watch for:
-
Excessive stiffness that requires extra force to move
-
Wobbly or loose handle motion
-
Difficulty engaging the return detent mechanism
Worn internal components, a misaligned spool, or debris inside the valve may cause stiff or inconsistent movement. Lubrication, cleaning, or part replacement can often resolve these issues.
Step 3: Test System Pressure Using a Gauge
Attach a hydraulic pressure gauge to the system and cycle the valve in both forward and reverse directions. Check the readings against the manufacturer’s specifications. Key points:
-
Low pressure readings may signal a worn relief valve or a faulty pump
-
Pressure drops during operation can indicate internal leakage within the valve
Accurate pressure measurement helps pinpoint whether the valve or another component is causing a weak splitting force. This step is critical for diagnosing performance-related issues rather than purely mechanical ones.
Step 4: Examine Spool Movement
Remove the valve from the machine and carefully inspect the spool inside the valve body. Common problems to look for:
-
Surface scratches, scoring, or wear that impede fluid flow
-
Rust, corrosion, or dirt contamination
-
Misalignment inside the valve body
A damaged or dirty spool restricts hydraulic fluid flow, causing sluggish or inconsistent ram movement. Cleaning the spool thoroughly or replacing it if damaged can restore smooth operation.
Step 5: Inspect Internal Seals and O-Rings
Internal seals and O-rings prevent fluid from bypassing the valve and losing pressure. Check for:
-
Brittle, cracked, or flattened seals
-
Leaks between valve chambers or past the spool
Replacing worn seals and O-rings ensures proper pressure is maintained and prevents internal leakage that can weaken the splitting force.
Step 6: Check the Detent Assembly
The detent assembly controls the return stroke of the cylinder. Inspect the internal components carefully:
-
Springs should be firm and intact
-
Ball bearings must move freely without obstruction
-
Retaining pins should not be bent or damaged
Worn or broken detent parts prevent the cylinder from returning properly, resulting in the control lever feeling unresponsive. Replacing damaged components restores smooth return operation.
Step 7: Evaluate the Relief Valve Setting
The relief valve regulates maximum hydraulic pressure. An incorrect setting can reduce splitting power or cause erratic operation. Actions to take:
-
Adjust the valve according to the log splitter manual or recommended pressure standards
-
Check that the valve opens and closes smoothly without leaks
Properly setting the relief valve ensures the ram has enough force to split logs efficiently and prevents unnecessary strain on the hydraulic system.
|
Pro Tip: If your log splitter’s ram loses power or stops under load, check for air trapped in the hydraulic lines and small fluid leaks, as these often reduce pressure. Always ensure the hydraulic fluid is at the correct level and type. |
How to Fix or Replace Faulty Log Splitter Control Valve Components
Once the problem has been diagnosed, the next step is to repair or replace the faulty parts. Below are common log splitter control valve repair solutions.
-
Inspect the control valve for internal leaks, stuck spools, or contamination if the ram doesn’t move.
-
Check that hydraulic fluid levels are correct and all hose connections are secure.
-
Clean the valve and replace worn O-rings or seals for minor issues.
-
Replace the entire valve if severely damaged, using an authorized replacement part.
-
Ensure proper alignment and torque of all mounting bolts during installation.
-
Regularly inspect hydraulic fluid, hoses, and fittings to prevent future valve failures.
Explore lawn detacher rake issues: expert fixes every homeowner should know to identify common problems and maintain a healthy, well-aerated lawn.
Conclusion: Ensuring Safe and Reliable Log Splitter Control Valve Performance
A properly maintained control valve keeps your log splitter running smoothly, safely, and with consistent hydraulic power. By diagnosing issues early and applying the right repair steps, you can prevent costly breakdowns and extend the lifespan of your equipment. Regular inspections, clean hydraulic fluid, and timely replacements of worn log splitter control valve parts help maintain peak efficiency and optimal performance over the long term.
Key Takeaways
-
The control valve directs hydraulic flow and ensures proper ram movement.
-
Early warning signs like leaks, weak pressure, or slow action indicate internal issues.
-
Using the correct tools and safety gear is essential when working with hydraulics.
-
A structured diagnostic process helps identify leaks, spool problems, and pressure faults.
-
Repairs often involve replacing seals, cleaning components, or tightening connections.
-
Severely damaged or worn valves should be replaced to restore full performance.
A well-maintained control valve is essential for smooth, safe, and consistent log splitter operation. Identifying issues early and following proper repair steps helps avoid major failures and costly downtime. With routine maintenance and timely part replacements, your log splitter will continue delivering reliable performance.
FAQs
What are common problems with log splitters?
Common issues include slow or stuck rams, hydraulic leaks, unresponsive valves, and unusual noises caused by worn seals or air in the lines.
Where is the bleed valve on a log splitter?
The bleed valve is typically on the hydraulic cylinder or near the control valve and releases trapped air to restore proper ram pressure.
How to adjust the log splitter control valve?
Loosen the adjustment screws, set the correct detent and pressure according to the manual, then tighten and test ram movement for smooth operation.
How to replace the control valve on a log splitter?
Release hydraulic pressure, remove hoses and bolts, install the new valve with proper alignment, refill fluid, and bleed the system before use.


